Hi all! I received a message last week asking how I create my star trails. So instead of writing that person back and sharing my process with just her, I decided to share with everyone at once. As always, this is MY process, MY way of taking photos and MY way of stacking. There are a number of ways to do this and other photographers have their way too. Please keep in mind this is really kind of a basic tutorial and my target are those who have never attempted this. As always, please excuse my grammar. 🙂
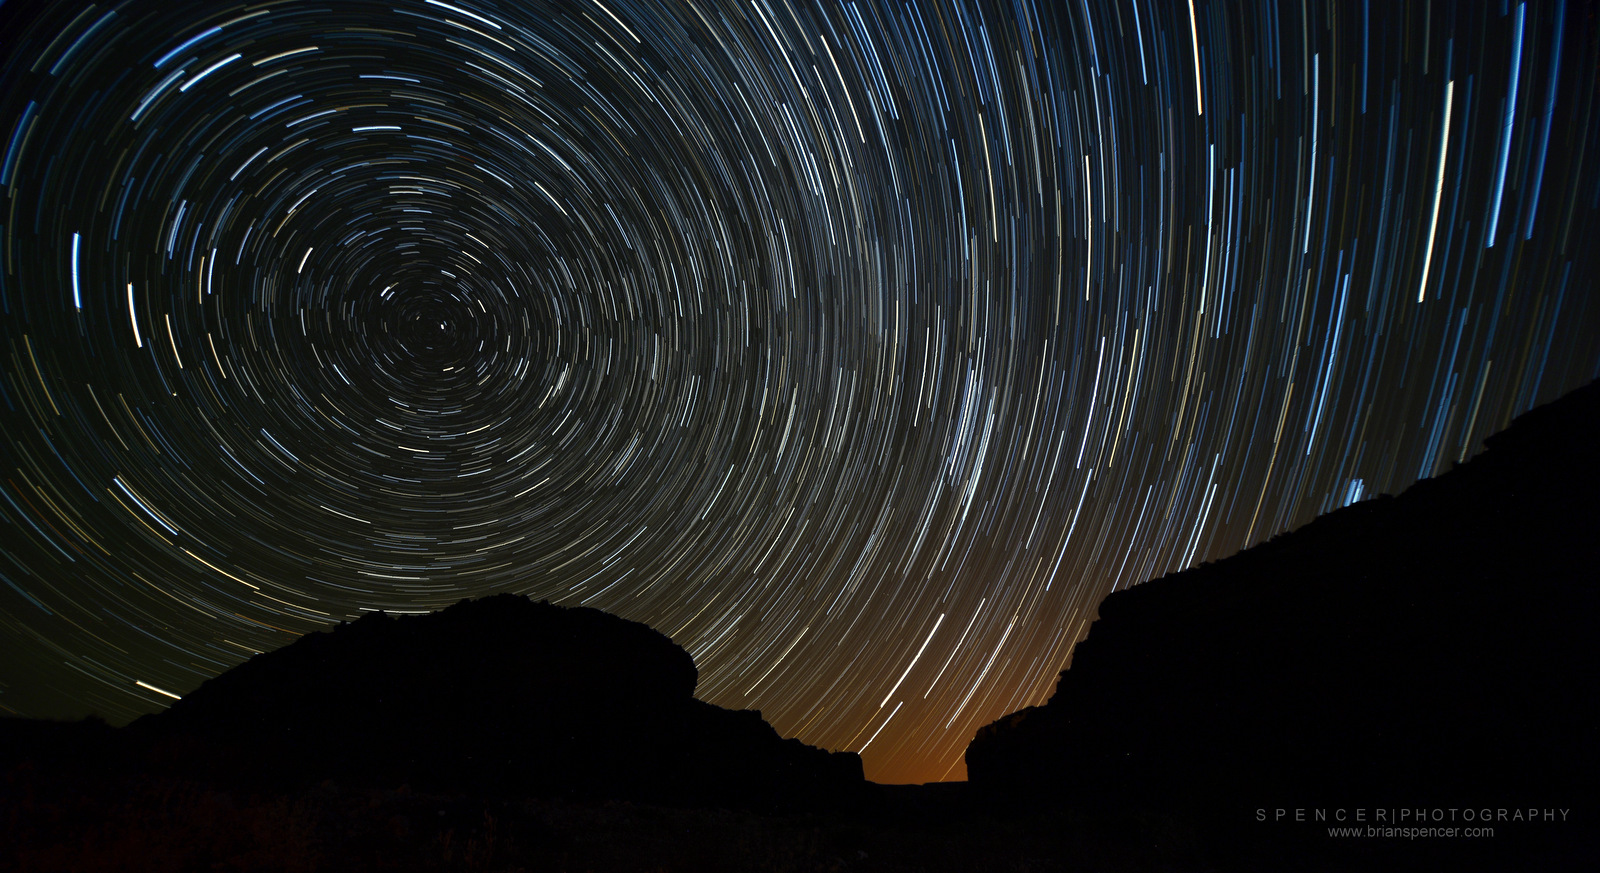
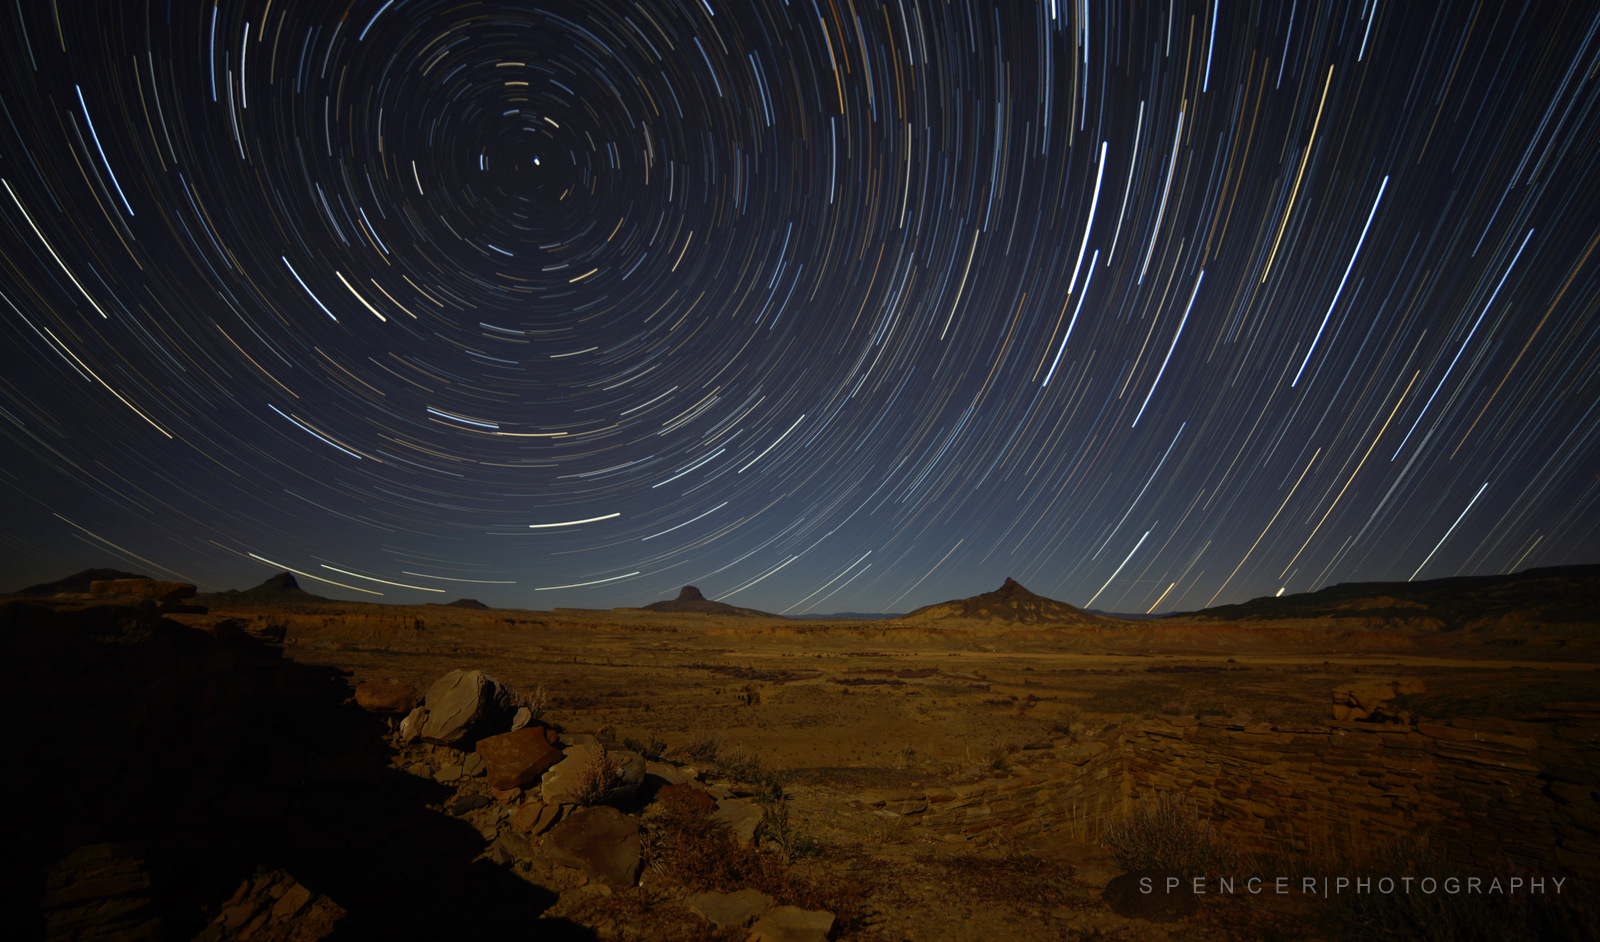
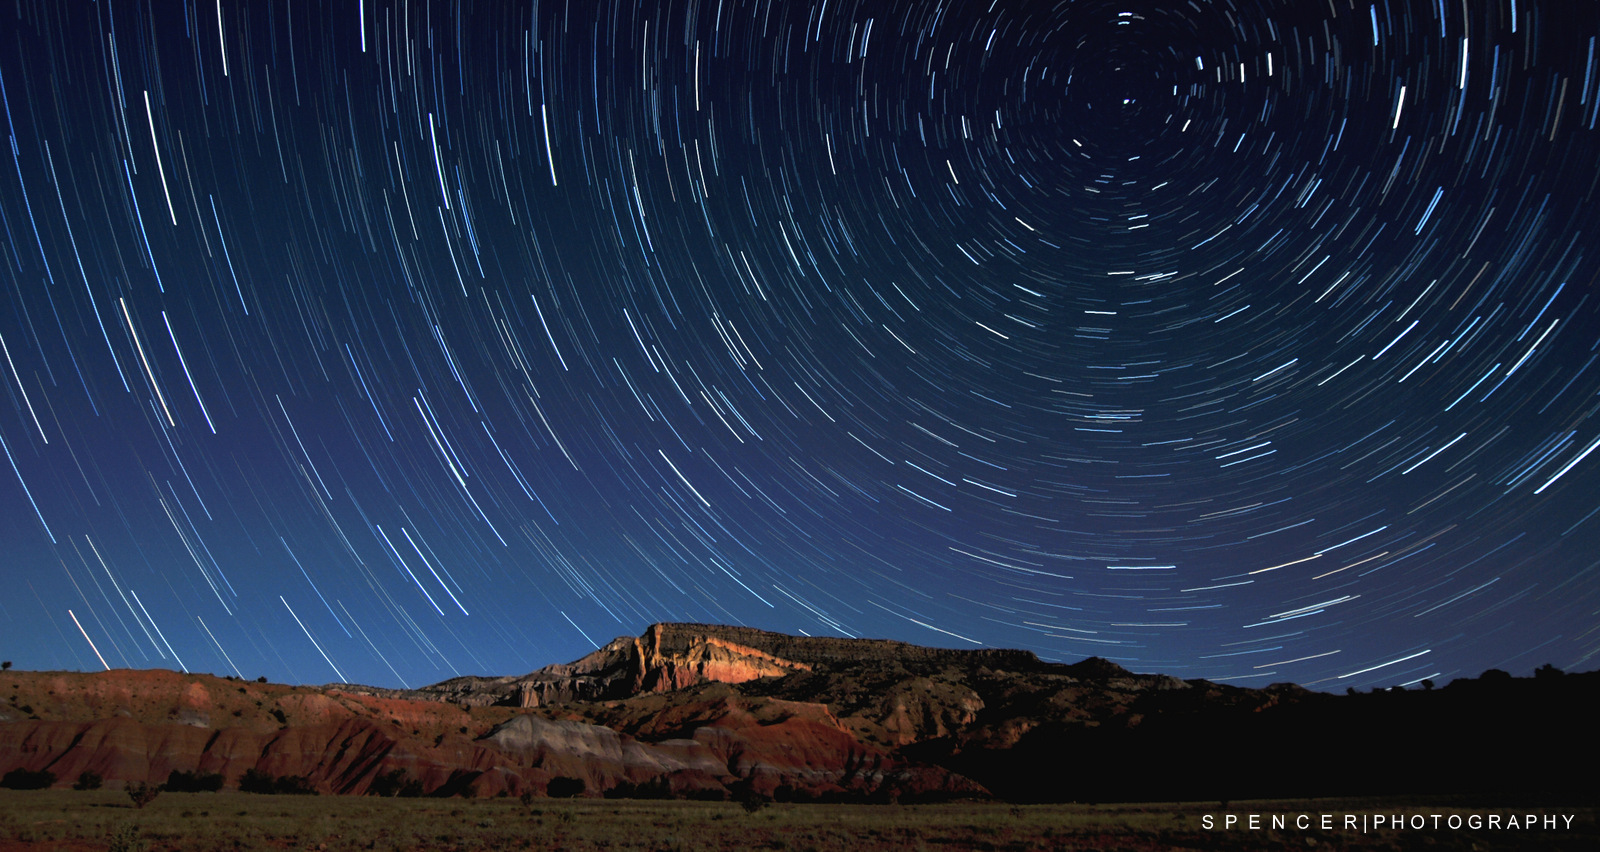
Lets get down to business. I’m a huge fan of any photo made at night. This is hands down my favorite type of photography. Included is the Milky Way, star trails, a single snap of the scape with stars – Any photo made at night. I especially enjoy star trails because of the perspective it gives to the landscape from the Earths rotation. Some folks think the only way to make star trails are with a single 30 minute exposure. Shooting a single 30 minute plus exposure is totally fine but the photo will be super noisy. I prefer to take 70-90 exposures at 30 seconds each and stack them. Stacking photos results in a cleaner final image. Some photographers like to shoot hundreds of photos and stack those. I normally shoot for about 30 to 45 minutes. At 30 seconds a piece, you will get two images every minute.

The Moon and light
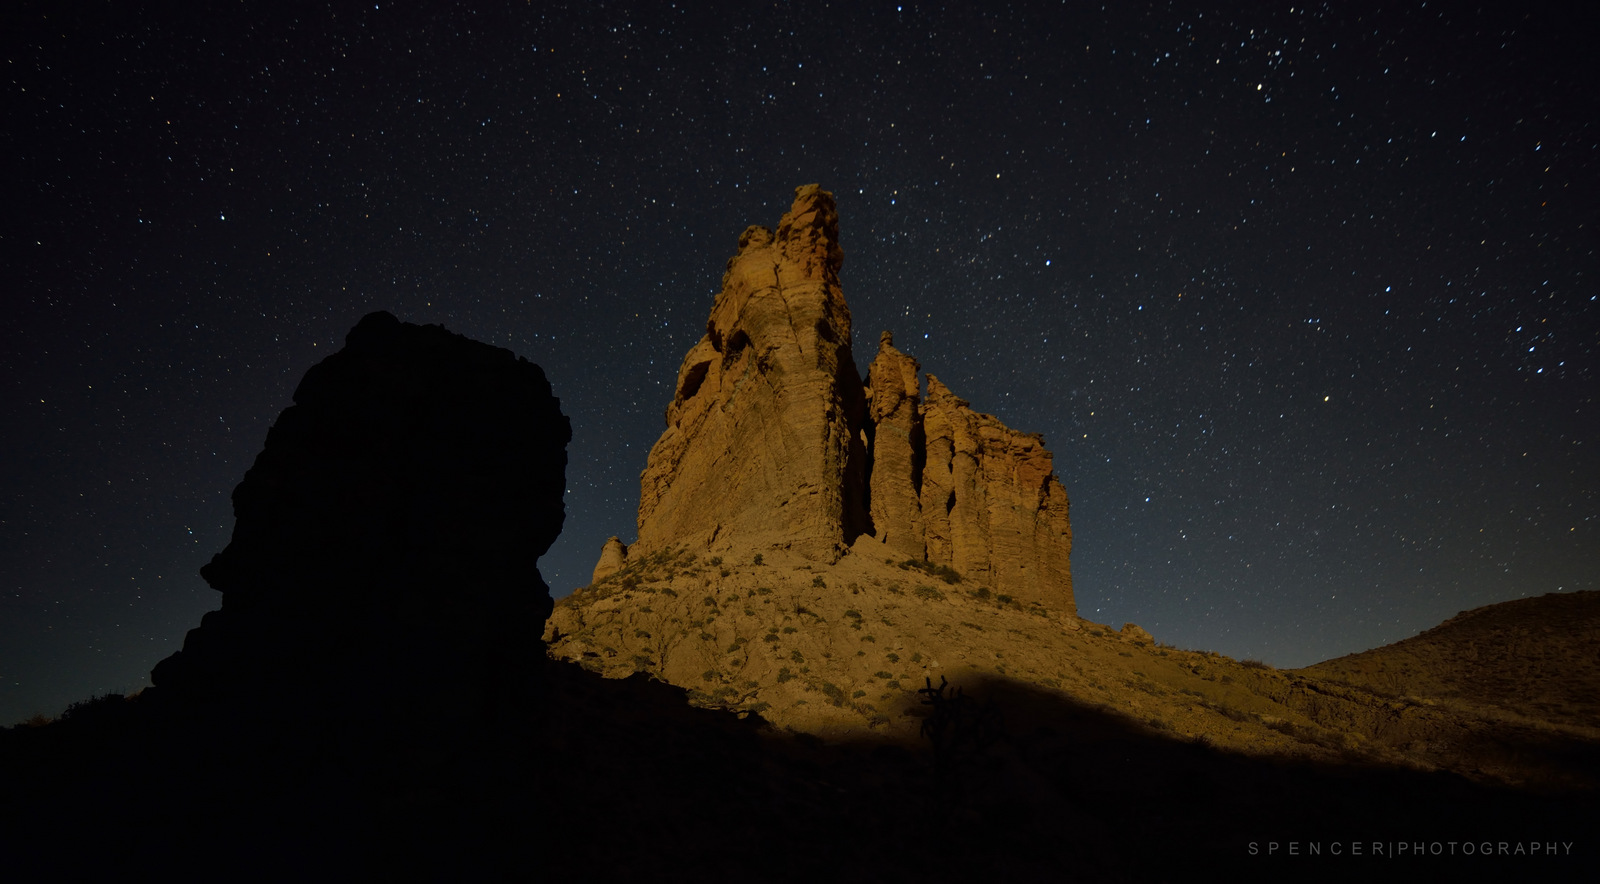
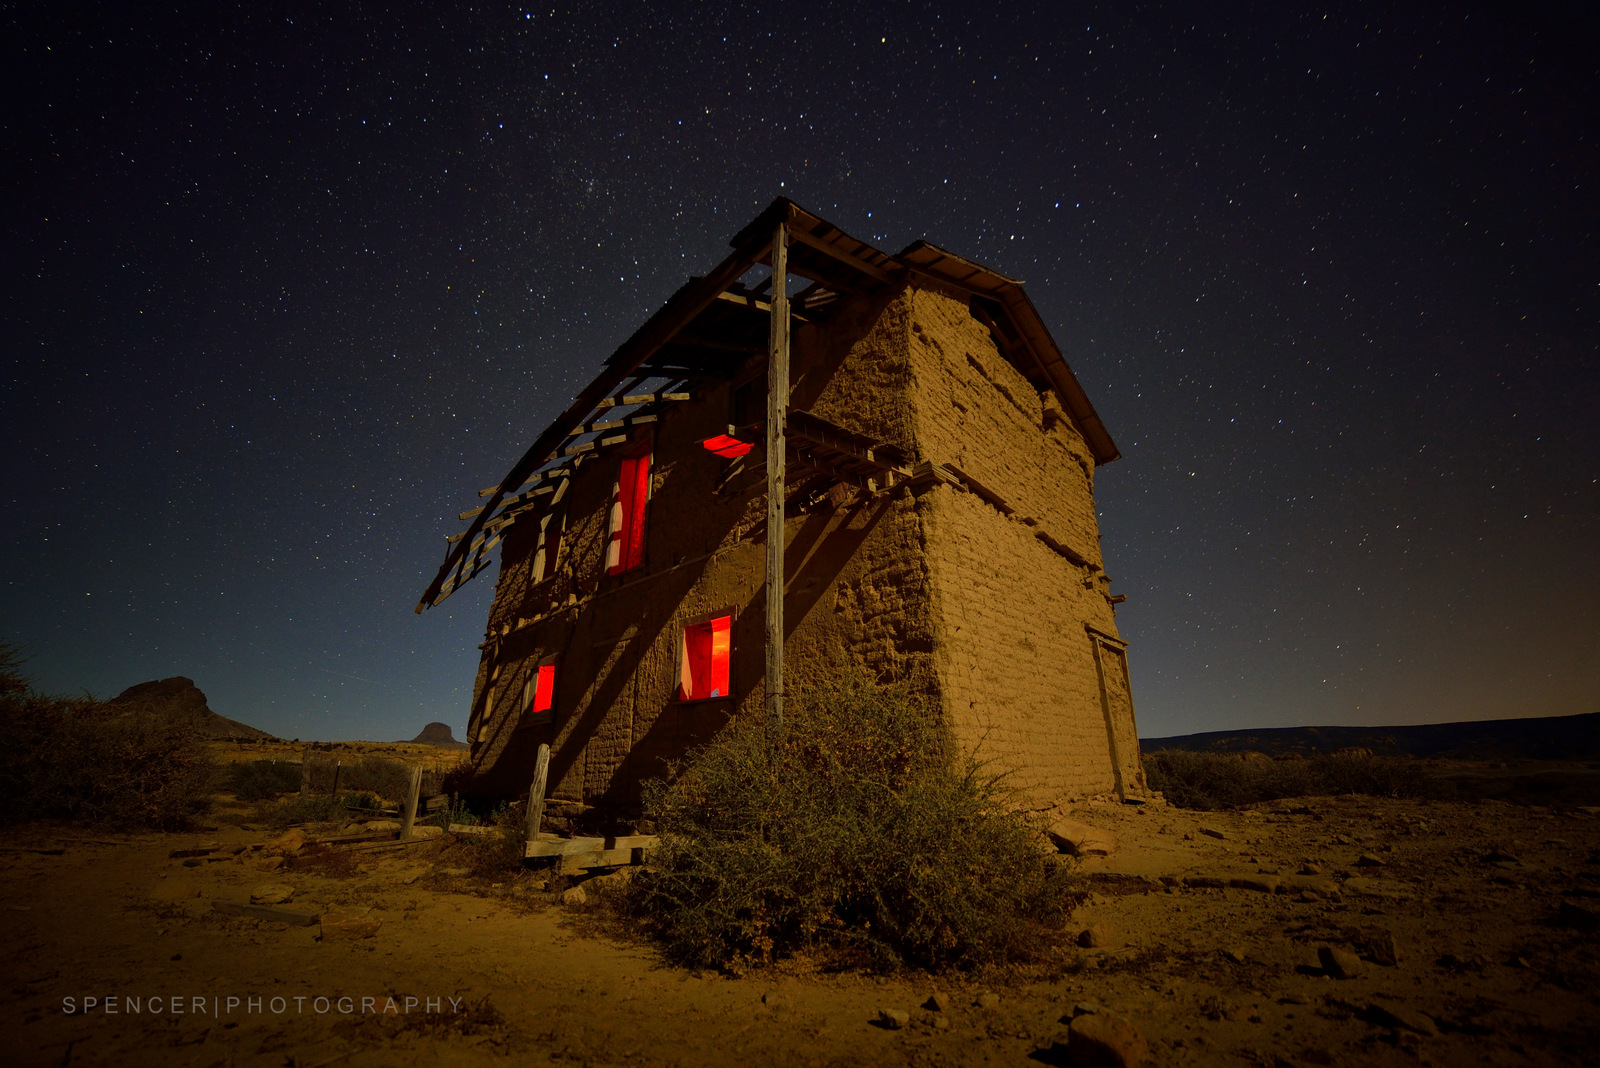
Unlike photographing the Milky Way (That Blog Post coming soon), I prefer to have a 3/4 (ish) Moon to illuminate the landscape. It balances the photo with light and exposure. On some lighter colored landscapes a full Moon may be a little bright and over power the stars. Bright lights from a city will work too if the lights are behind the camera and illuminating the landscape gently. Of course there have been times I’ve stacked photos with no illumination of the scape. But I will always prefer some light when I can get it.
Location
I usually choose my location with something interesting in the foreground like mountains, an old building or a dead tree to give the entire photo perspective. I never photo just the stars alone. In addition, I always choose a Northern view with the North star in the frame to take advantage of the earths rotation and the view it creates when stacked. Finally, I always make sure there will be no extra lights like headlamps, automobile headlights, etc in my shot because a single exposure with extra light can ruin the entire stack. Always make sure you are shooting in a location with no light interruptions.

Equipment
You can make star trails with most any camera that has the ability to make 30 second exposures at ISO200. When I photo the Milky Way I only use a Full Frame DSLR because of its high ISO performance. But with stacking photos, 30 seconds at ISO200 with a fast lens (f/2.8) and any DSLR is perfect. So I’ll use either my crop sensor or my Full Frame to make photos and then stack.
Camera – Any Full Frame DSLR like a Canon 1D/5DMKIII/MKII/6D, a Nikon D4/D3s/D700/D600/D800/D4, etc, and other brands of full frame cameras are perfect. Any crop sensor (APS-C size) like that of a Nikon D3100/3200/D5100/D5200/D7000/D7100/D90/D80/D300(S), etc, or a Canon T2/T3/T4/T5/40D/50D/60D/7D, etc. As far as other cameras such as point n shoots or mirrorless are concerned, if they have the option to shoot in manual and set the exposure, aperture, and ISO, they should be fine. The take away here is find a camera that can shoot in manual (M mode) at ISO200 for 30 seconds.
Lens – If using a DSLR, the best is a fast wide lens. My favorites are the Tokina 11-16mm f/2.8 on my crop sensor (APS-C) and my Samyang 14mm F/2.8 on my Full Frame. I always shoot wide open at f/2.8 and at the widest angle of view. Now most people get their cameras with kit lenses (18-55mm) and most of those lenses have a maximum aperture of f/3.5 at 18mm. I’ve done stacks with F/4 lenses and raised my ISO to 320. So a kit lens like a 18-55mm should be fine.
Tripod – A must have. This is VERY important. You will need a very sturdy tripod to mount your camera on as you will be shooting for 30 or more minutes to make about 70 to 90 photos to stack. If your tripod moves even a little bit when shooting, your final product will result without the perfect curvature of the trail reflecting the Earths rotation.
Intervalometer – Some photographers prefer to use a wired intervalometer/remote. This device allows you program and setup an automated continuous cycle of 30 second exposures. This is really handy if you don’t want to stand by your camera for 30 or 45 minutes hitting the shutter button over and over every 30 seconds. Some of the newer Nikon and Canon models (and others) have built in intervalometers. However, if you don’t have any of the above, its really not that much work to setup a chair by your camera and just hit the shutter button every 30 seconds if you have a sturdy tripod. 😉 I use one like this. Or just search for Amazon or your favorite camera retailer for “Intervalometer”.
Don’t forget to have a fully charged battery and a memory card with enough room to store a few hundred files if you’re shooting for a couple of hours.
Process/Setup/Shooting
1. Find your spot and secure the camera to the tripod. Once you have your view, don’t move the camera when shooting.
2. Set your camera to M or Manual mode.
3. Set your aperture to its fastest f/2.8, f/3.5, etc.
4. If using a zoom lens, set it to the widest view. 18mm, etc.
5. Turn off Autofocus and set your lens to the infinity mark. Look at the lens focus ring and find the focus mark (line) and line that up with the infinity symbol (the sideways 8).
6. Set your exposure to 30 seconds if you are manually hitting the shutter button. You will hear the shutter open and then close after 30 seconds. Just hit the shutter button again and repeat 70-90 times. Or you can use and intervalometer to automate the process.
7. Set your NR (Long Exposure Noise Reduction) to OFF. This is VERY important. NR takes an additional 30 seconds after EVERY photo to reduce noise. If turned on, you will end up with gaps in the stack.
8. RAW vs. JPG – I shoot in RAW and process my RAW photos in Nikon Capture NX or Photoshop. But you will be fine to shoot and JPG and still get some amazing results.
9. Set your camera to ISO200 and turn off Auto ISO. Take a test photo and make sure the exposure looks good. Too dark? Adjust your ISO up to 320 and then take another photo. If the photo looks a bit dark, don’t worry. You can add light and contrast in your post process.
Stacking
I stack my photos in Photoshop. But there are lots of other free pieces of software out there to do it. You can Google the process or find it on Youtube. I might be putting together another blog post about how I stack later on down the road. But for a free, quick and easy way, visit http://www.startrails.de and download their stacker. Adjust contrast and brightness using another free photo editor such as Picasa from Google after you have completed the stack.